Send data from activity to fragment in android

Update

Send data from activity to fragment in android

In this example We learn how to send two string from Activity to fragment.

Android recommends to use newInstance.

In the activity:

FirstFragment fragment = FirstFragment.newInstance("Param One","Param Two");

In the fragment:

    public static FirstFragment newInstance(String param1, String param2) {
        FirstFragment fragment = new FirstFragment();
        Bundle args = new Bundle();
        args.putString(ARG_PARAM1, param1);
        args.putString(ARG_PARAM2, param2);
        fragment.setArguments(args);
        return fragment;
    }

    @Override
    public void onCreate(Bundle savedInstanceState) {
        super.onCreate(savedInstanceState);
        if (getArguments() != null) {
            mParam1 = getArguments().getString(ARG_PARAM1);
            mParam2 = getArguments().getString(ARG_PARAM2);
        }
    }


From Activity you send data with intent as:

public class MainActivity extends AppCompatActivity {
 
    @Override
    protected void onCreate(Bundle savedInstanceState) {
        super.onCreate(savedInstanceState);
        setContentView(R.layout.activity_main);
    }
 
    public void goToFragment(View view) {
        FirstFragment fragment = FirstFragment.newInstance("Param One","Param Two");
 
        replaceFragment(fragment, "FirstFragment");
        view.setVisibility(View.GONE);
    }


    public void replaceFragment(Fragment fragment, String tag) {
 
        try {
 
            FragmentManager fragmentManager = getSupportFragmentManager();
            fragmentManager.beginTransaction().replace(R.id.content_main, fragment, tag).commit();
 
        } catch (Exception e) {
            Log.d(TAG, e.toString());
        }
 
    }
}

and in Fragment onCreateView method:

public class FirstFragment extends Fragment {
    // the fragment initialization parameters, e.g. ARG_ITEM_NUMBER
    private static final String ARG_PARAM1 = "param1";
    private static final String ARG_PARAM2 = "param2";
 
    private String mParam1;
    private String mParam2;
 
    public FirstFragment() {
        // Required empty public constructor
    }
 
    /**
     * Use this factory method to create a new instance of
     * this fragment using the provided parameters.
     *
     * @param param1 Parameter 1.
     * @param param2 Parameter 2.
     * @return A new instance of fragment FirstFragment.
     */
    public static FirstFragment newInstance(String param1, String param2) {
        FirstFragment fragment = new FirstFragment();
        Bundle args = new Bundle();
        args.putString(ARG_PARAM1, param1);
        args.putString(ARG_PARAM2, param2);
        fragment.setArguments(args);
        return fragment;
    }
 
    @Override
    public void onCreate(Bundle savedInstanceState) {
        super.onCreate(savedInstanceState);
        if (getArguments() != null) {
            mParam1 = getArguments().getString(ARG_PARAM1);
            mParam2 = getArguments().getString(ARG_PARAM2);
        }
    }
 
    @Override
    public View onCreateView(LayoutInflater inflater, ViewGroup container,
                             Bundle savedInstanceState) {
        // Inflate the layout for this fragment
        View view = inflater.inflate(R.layout.fragment_first, container, false);
        TextView textView1 = (TextView) view.findViewById(R.id.fragment_first_param_one);
        TextView textView2 = (TextView) view.findViewById(R.id.fragment_first_param_two);
 
        textView1.setText(mParam1);
        textView2.setText(mParam2);
 
        return view;
    }
 
    @Override
    public void onAttach(Context context) {
        super.onAttach(context);
    }
 
    @Override
    public void onDetach() {
        super.onDetach();
    }
 
}

fragment_first.xml

<RelativeLayout xmlns:android="http://schemas.android.com/apk/res/android"
    xmlns:tools="http://schemas.android.com/tools"
    android:layout_width="match_parent"
    android:layout_height="match_parent"
    tools:context="com.example.javier.activitytofragment.FirstFragment">
 
    <TextView
        android:id="@+id/fragment_first_param_one"
        android:layout_width="wrap_content"
        android:layout_height="wrap_content"
        android:layout_centerInParent="true"
        android:text="@string/hello_blank_fragment" />
 
    <TextView
        android:id="@+id/fragment_first_param_two"
        android:layout_width="wrap_content"
        android:layout_height="wrap_content"
        android:layout_centerHorizontal="true"
        android:layout_below="@+id/fragment_first_param_one"
        android:text="@string/hello_blank_fragment" />
 
</RelativeLayout>

contentent_main.xml(This content has the fragment)

<?xml version="1.0" encoding="utf-8"?>
<RelativeLayout xmlns:android="http://schemas.android.com/apk/res/android"
    android:id="@+id/content_main"
    android:layout_width="match_parent"
    android:layout_height="match_parent"
    android:orientation="vertical">
 
</RelativeLayout>

content_activity.xml (This content has the activity)

<?xml version="1.0" encoding="utf-8"?>
<RelativeLayout xmlns:android="http://schemas.android.com/apk/res/android"
    android:orientation="vertical" android:layout_width="match_parent"
    android:layout_height="match_parent">
 
    <Button
        android:layout_width="match_parent"
        android:layout_height="wrap_content"
        android:layout_centerVertical="true"
        android:onClick="goToFragment" />
 
</RelativeLayout>

activity_main.xml(this layout has the contents)

<?xml version="1.0" encoding="utf-8"?>
<RelativeLayout xmlns:android="http://schemas.android.com/apk/res/android"
    xmlns:tools="http://schemas.android.com/tools"
    android:layout_width="match_parent"
    android:layout_height="match_parent"
    android:paddingBottom="@dimen/activity_vertical_margin"
    android:paddingLeft="@dimen/activity_horizontal_margin"
    android:paddingRight="@dimen/activity_horizontal_margin"
    android:paddingTop="@dimen/activity_vertical_margin"
    tools:context="com.example.javier.activitytofragment.MainActivity">
 
    <include layout="@layout/content_activity" />
    <include layout="@layout/content_main" />
</RelativeLayout>

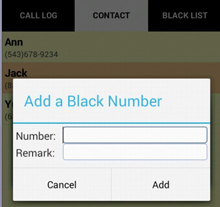
How to prevent a AlertDialog from closing when a button is clicked

prevent a AlertDialog from closing when a button is clicked
You can prevent a AlertDialog from closing when a button is clicked.

It’s very easy you just need to use the following code in your application:

final AlertDialog dialog = new AlertDialog.Builder(context)
        .setView(v)
        .setTitle(R.string.my_title)
        .setPositiveButton(android.R.string.ok, null) //Set to null. We override the onclick
        .setNegativeButton(android.R.string.cancel, null)
        .create();

dialog.setOnShowListener(new DialogInterface.OnShowListener() {

    @Override
    public void onShow(DialogInterface dialog) {

        Button b = dialog.getButton(AlertDialog.BUTTON_POSITIVE);
        b.setOnClickListener(new View.OnClickListener() {

            @Override
            public void onClick(View view) {
                // TODO Do something

            }
        });
    }
});

Custom theme

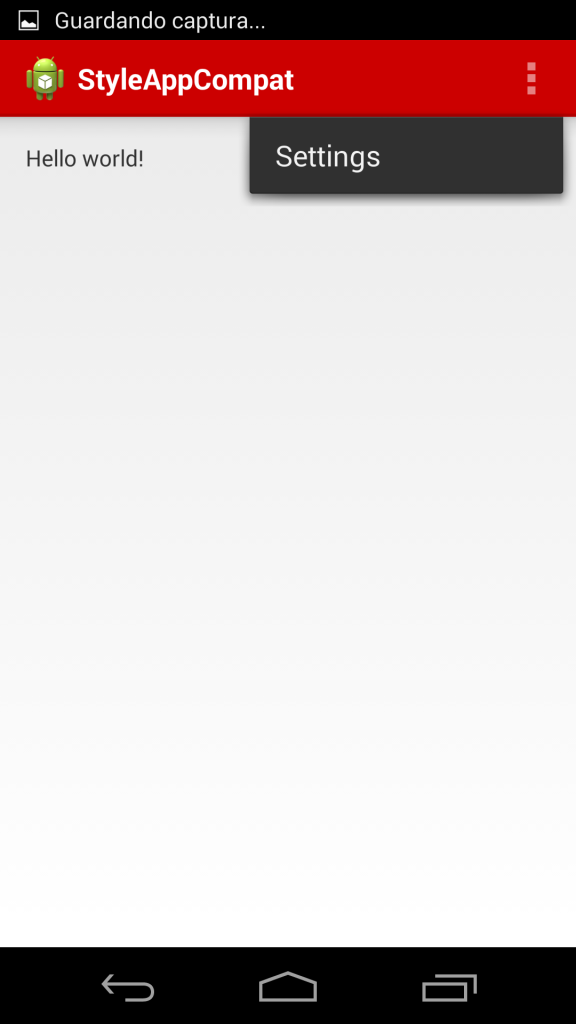
In this post you create your custom theme.

Custom theme

The first step is generate the drawable.

The second step import AppCompat library.

The third step in res/values-v14/style.xml

<!-- general styles for the action bar -->

<style>
<item name="android:popupMenuStyle">@style/PopupMenu.Example</item>
        <item name="android:dropDownListViewStyle">@style/DropDownListView.Example</item>
        <item name="android:actionBarStyle">@style/MyTheme.ActionBarStyle</item>
        <item name="android:actionBarTabStyle">@style/ActionBarTabStyle.Example</item>
        <item name="android:actionDropDownStyle">@style/DropDownNav.Example</item>
        <item name="android:actionBarStyle">@style/ActionBar.Solid.Example</item>
        <item name="android:actionModeBackground">@drawable/cab_background_top_example</item>
        <item name="android:actionModeSplitBackground">@drawable/cab_background_bottom_example</item>

</style>
<style>
<item name="android:background">@drawable/ab_solid_example</item>
        <item name="android:backgroundStacked">@drawable/ab_stacked_solid_example</item>
        <item name="android:backgroundSplit">@drawable/ab_bottom_solid_example</item>
        <item name="android:textColor">@color/blue</item>
        <item name="android:titleTextStyle">@style/MyTheme.ActionBar.TitleTextStyle</item>
</style>

<style>
<item name="android:textColor">@color/white</item>
<item name="android:textStyle">bold</item>

</style>

<style>
<item name="android:background">@drawable/ab_transparent_example</item>
<item name="android:progressBarStyle">@style/ProgressBar.Example</item>
</style>

<style>
<item name="android:popupBackground">@drawable/menu_dropdown_panel_example</item>
</style>

<style>
<item name="android:listSelector">@drawable/menu_dropdown_panel_example</item>
</style>

<style>
<item name="android:background">@drawable/tab_selected_example</item>
</style>

<style>
<item name="android:background">@drawable/spinner_ab_default_example</item>
<item name="android:popupBackground">@drawable/menu_dropdown_panel_example</item>
<item name="android:dropDownSelector">@drawable/menu_dropdown_panel_example</item>
</style>

<!-- this style is only referenced in a Light.DarkActionBar based theme -->

<style>
<item name="android:popupMenuStyle">@style/PopupMenu.Example</item>
<item name="android:dropDownListViewStyle">@style/DropDownListView.Example</item>
</style>

Vertical and horizontal scrolling

Sometimes you need to show a lot of information in a small space,

for example in TableLayout, you can to make a vertical and horizontal scrolling.

 <ScrollView xmlns:android="http://schemas.android.com/apk/res/android"
                  android:layout_width="fill_parent"
                  android:layout_height="wrap_content">

    <HorizontalScrollView 
                  android:layout_width="wrap_content"
                  android:layout_height="fill_parent">

         <TableLayout
                  android:id="@+id/amortization"
                  android:layout_width="wrap_content"
                  android:layout_height="wrap_content">

              <TableRow
                  android:background="#3366FF">
                  <TextView
                       android:text="@string/tableRow_1"
                       android:background="#FFFFFF"
                       android:padding="3dip"/>
                  <TextView
                       android:text="@string/hello_world_1"
                       android:padding="3dip"/>
                  <TextView
                       android:text="@string/hello_world_2"
                       android:padding="3dip"/>
                  <TextView
                       android:text="@string/hello_world_3"
                       android:padding="3dip"/>
                  <TextView
                       android:text="@string/hello_world_4"
                       android:padding="3dip"/>
                  <TextView
                       android:text="@string/hello_world_5"
                       android:padding="3dip"/>
                  <TextView
                       android:text="@string/hello_world_6"
                       android:padding="3dip"/>
                  <TextView
                       android:text="@string/hello_world_7"
                       android:padding="3dip"/>
                  <TextView
                       android:text="@string/hello_world_8"
                       android:padding="3dip"/>
                  <TextView
                       android:text="@string/hello_world_9"
                       android:padding="3dip"/>
              </TableRow>
         </TableLayout>
    </HorizontalScrollView>
</ScrollView>

you can download this code: download code

Integrating with Twitter on Android

Integrating with Twitter on Android

The first step:

To create a button in your .xml

<RelativeLayout xmlns:android="http://schemas.android.com/apk/res/android"
    xmlns:tools="http://schemas.android.com/tools"
    android:layout_width="match_parent"
    android:layout_height="match_parent"
    android:paddingBottom="@dimen/activity_vertical_margin"
    android:paddingLeft="@dimen/activity_horizontal_margin"
    android:paddingRight="@dimen/activity_horizontal_margin"
    android:paddingTop="@dimen/activity_vertical_margin"
    tools:context=".TheDeveloperWorldIsYours" >

    <button
        android:id="@+id/twitterButton"
        android:layout_width="wrap_content"
        android:layout_height="wrap_content"/>

</RelativeLayout>

Now in your .class, you should your dialog, this form.

public class TheDeveloperWorldIsYours extends Activity {
	private Button mTwitterButton;

	@Override
	protected void onCreate(Bundle savedInstanceState) {
		super.onCreate(savedInstanceState);
		setContentView(R.layout.activity_the_developer_world_is_yours);

		mTwitterButton = (Button) findViewById(R.id.twitterButton);
		mTwitterButton.setOnClickListener(new OnClickListener() {

			@Override
			public void onClick(View v) {

				// TODO Auto-generated method stub

				Intent share = findTwitterClient();

				if (share != null) {

					share.setType("text/plain");

					share.putExtra(Intent.EXTRA_TEXT, "TEXT");

					startActivity(share);
				}

				else {

					AlertDialog.Builder builder = new AlertDialog.Builder(
							TheDeveloperWorldIsYours.this);

					builder.setMessage("Instal twitter")

					.setTitle("¡attention!")

					.setCancelable(false)

					.setNeutralButton("Accept",

					new DialogInterface.OnClickListener() {

						public void onClick(DialogInterface dialog, int id) {

							dialog.cancel();

						}

					});

					AlertDialog alert = builder.create();

					alert.show();

					System.out.println("TEXT");

				}

			}

		});
	}

	public Intent findTwitterClient() {
	    final String[] twitterApps = {
	            // package // name - nb installs (thousands)
	            "com.twitter.android", // official - 10 000
	            "com.twidroid", // twidroid - 5 000
	            "com.handmark.tweetcaster", // Tweecaster - 5 000
	            "com.thedeck.android" }; // TweetDeck - 5 000 };
	    Intent tweetIntent = new Intent();
	    tweetIntent.setType("text/plain");
	    final PackageManager packageManager = getPackageManager();
	    List list = packageManager.queryIntentActivities(
	            tweetIntent, PackageManager.MATCH_DEFAULT_ONLY);

	    for (int i = 0; i < twitterApps.length; i++) {
	        for (ResolveInfo resolveInfo : list) {
	            String p = resolveInfo.activityInfo.packageName;
	            if (p != null && p.startsWith(twitterApps[i])) {
	                tweetIntent.setPackage(p);
	                return tweetIntent;
	            }
	        }
	    }
	    return null;

	}

}