How to prevent a AlertDialog from closing when a button is clicked

prevent a AlertDialog from closing when a button is clicked
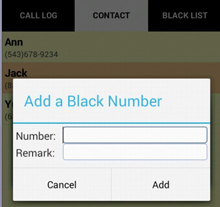
You can prevent a AlertDialog from closing when a button is clicked.

It’s very easy you just need to use the following code in your application:

final AlertDialog dialog = new AlertDialog.Builder(context)
        .setView(v)
        .setTitle(R.string.my_title)
        .setPositiveButton(android.R.string.ok, null) //Set to null. We override the onclick
        .setNegativeButton(android.R.string.cancel, null)
        .create();

dialog.setOnShowListener(new DialogInterface.OnShowListener() {

    @Override
    public void onShow(DialogInterface dialog) {

        Button b = dialog.getButton(AlertDialog.BUTTON_POSITIVE);
        b.setOnClickListener(new View.OnClickListener() {

            @Override
            public void onClick(View view) {
                // TODO Do something

            }
        });
    }
});

Custom theme

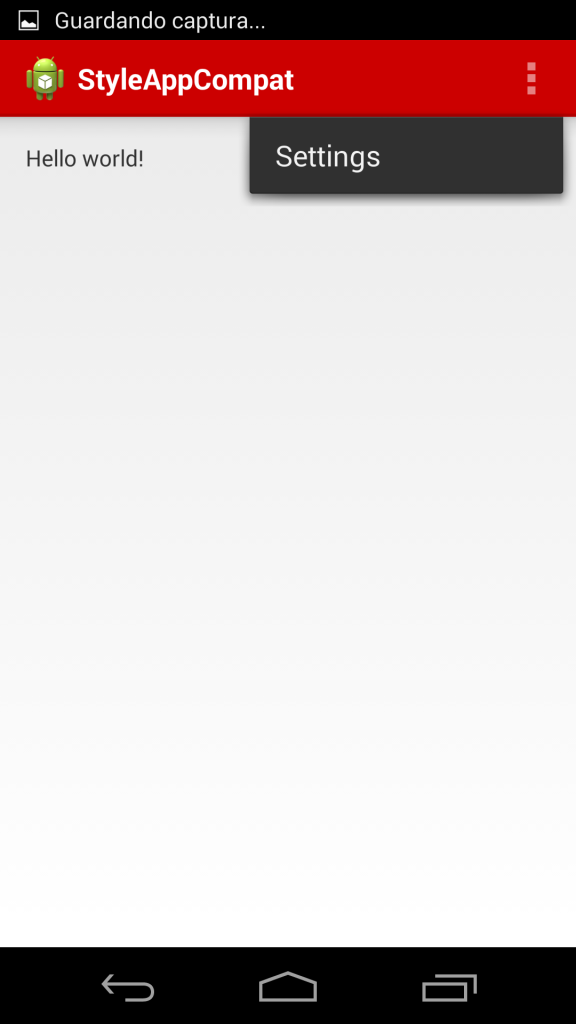
In this post you create your custom theme.

Custom theme

The first step is generate the drawable.

The second step import AppCompat library.

The third step in res/values-v14/style.xml

<!-- general styles for the action bar -->

<style>
<item name="android:popupMenuStyle">@style/PopupMenu.Example</item>
        <item name="android:dropDownListViewStyle">@style/DropDownListView.Example</item>
        <item name="android:actionBarStyle">@style/MyTheme.ActionBarStyle</item>
        <item name="android:actionBarTabStyle">@style/ActionBarTabStyle.Example</item>
        <item name="android:actionDropDownStyle">@style/DropDownNav.Example</item>
        <item name="android:actionBarStyle">@style/ActionBar.Solid.Example</item>
        <item name="android:actionModeBackground">@drawable/cab_background_top_example</item>
        <item name="android:actionModeSplitBackground">@drawable/cab_background_bottom_example</item>

</style>
<style>
<item name="android:background">@drawable/ab_solid_example</item>
        <item name="android:backgroundStacked">@drawable/ab_stacked_solid_example</item>
        <item name="android:backgroundSplit">@drawable/ab_bottom_solid_example</item>
        <item name="android:textColor">@color/blue</item>
        <item name="android:titleTextStyle">@style/MyTheme.ActionBar.TitleTextStyle</item>
</style>

<style>
<item name="android:textColor">@color/white</item>
<item name="android:textStyle">bold</item>

</style>

<style>
<item name="android:background">@drawable/ab_transparent_example</item>
<item name="android:progressBarStyle">@style/ProgressBar.Example</item>
</style>

<style>
<item name="android:popupBackground">@drawable/menu_dropdown_panel_example</item>
</style>

<style>
<item name="android:listSelector">@drawable/menu_dropdown_panel_example</item>
</style>

<style>
<item name="android:background">@drawable/tab_selected_example</item>
</style>

<style>
<item name="android:background">@drawable/spinner_ab_default_example</item>
<item name="android:popupBackground">@drawable/menu_dropdown_panel_example</item>
<item name="android:dropDownSelector">@drawable/menu_dropdown_panel_example</item>
</style>

<!-- this style is only referenced in a Light.DarkActionBar based theme -->

<style>
<item name="android:popupMenuStyle">@style/PopupMenu.Example</item>
<item name="android:dropDownListViewStyle">@style/DropDownListView.Example</item>
</style>

Vertical and horizontal scrolling

Sometimes you need to show a lot of information in a small space,

for example in TableLayout, you can to make a vertical and horizontal scrolling.

 <ScrollView xmlns:android="http://schemas.android.com/apk/res/android"
                  android:layout_width="fill_parent"
                  android:layout_height="wrap_content">

    <HorizontalScrollView 
                  android:layout_width="wrap_content"
                  android:layout_height="fill_parent">

         <TableLayout
                  android:id="@+id/amortization"
                  android:layout_width="wrap_content"
                  android:layout_height="wrap_content">

              <TableRow
                  android:background="#3366FF">
                  <TextView
                       android:text="@string/tableRow_1"
                       android:background="#FFFFFF"
                       android:padding="3dip"/>
                  <TextView
                       android:text="@string/hello_world_1"
                       android:padding="3dip"/>
                  <TextView
                       android:text="@string/hello_world_2"
                       android:padding="3dip"/>
                  <TextView
                       android:text="@string/hello_world_3"
                       android:padding="3dip"/>
                  <TextView
                       android:text="@string/hello_world_4"
                       android:padding="3dip"/>
                  <TextView
                       android:text="@string/hello_world_5"
                       android:padding="3dip"/>
                  <TextView
                       android:text="@string/hello_world_6"
                       android:padding="3dip"/>
                  <TextView
                       android:text="@string/hello_world_7"
                       android:padding="3dip"/>
                  <TextView
                       android:text="@string/hello_world_8"
                       android:padding="3dip"/>
                  <TextView
                       android:text="@string/hello_world_9"
                       android:padding="3dip"/>
              </TableRow>
         </TableLayout>
    </HorizontalScrollView>
</ScrollView>

you can download this code: download code

Integrating with Twitter on Android

Integrating with Twitter on Android

The first step:

To create a button in your .xml

<RelativeLayout xmlns:android="http://schemas.android.com/apk/res/android"
    xmlns:tools="http://schemas.android.com/tools"
    android:layout_width="match_parent"
    android:layout_height="match_parent"
    android:paddingBottom="@dimen/activity_vertical_margin"
    android:paddingLeft="@dimen/activity_horizontal_margin"
    android:paddingRight="@dimen/activity_horizontal_margin"
    android:paddingTop="@dimen/activity_vertical_margin"
    tools:context=".TheDeveloperWorldIsYours" >

    <button
        android:id="@+id/twitterButton"
        android:layout_width="wrap_content"
        android:layout_height="wrap_content"/>

</RelativeLayout>

Now in your .class, you should your dialog, this form.

public class TheDeveloperWorldIsYours extends Activity {
	private Button mTwitterButton;

	@Override
	protected void onCreate(Bundle savedInstanceState) {
		super.onCreate(savedInstanceState);
		setContentView(R.layout.activity_the_developer_world_is_yours);

		mTwitterButton = (Button) findViewById(R.id.twitterButton);
		mTwitterButton.setOnClickListener(new OnClickListener() {

			@Override
			public void onClick(View v) {

				// TODO Auto-generated method stub

				Intent share = findTwitterClient();

				if (share != null) {

					share.setType("text/plain");

					share.putExtra(Intent.EXTRA_TEXT, "TEXT");

					startActivity(share);
				}

				else {

					AlertDialog.Builder builder = new AlertDialog.Builder(
							TheDeveloperWorldIsYours.this);

					builder.setMessage("Instal twitter")

					.setTitle("¡attention!")

					.setCancelable(false)

					.setNeutralButton("Accept",

					new DialogInterface.OnClickListener() {

						public void onClick(DialogInterface dialog, int id) {

							dialog.cancel();

						}

					});

					AlertDialog alert = builder.create();

					alert.show();

					System.out.println("TEXT");

				}

			}

		});
	}

	public Intent findTwitterClient() {
	    final String[] twitterApps = {
	            // package // name - nb installs (thousands)
	            "com.twitter.android", // official - 10 000
	            "com.twidroid", // twidroid - 5 000
	            "com.handmark.tweetcaster", // Tweecaster - 5 000
	            "com.thedeck.android" }; // TweetDeck - 5 000 };
	    Intent tweetIntent = new Intent();
	    tweetIntent.setType("text/plain");
	    final PackageManager packageManager = getPackageManager();
	    List list = packageManager.queryIntentActivities(
	            tweetIntent, PackageManager.MATCH_DEFAULT_ONLY);

	    for (int i = 0; i < twitterApps.length; i++) {
	        for (ResolveInfo resolveInfo : list) {
	            String p = resolveInfo.activityInfo.packageName;
	            if (p != null && p.startsWith(twitterApps[i])) {
	                tweetIntent.setPackage(p);
	                return tweetIntent;
	            }
	        }
	    }
	    return null;

	}

}

Integrate Jira with Android

If you want integrate jira in your android proyect you will download a library which is JMC(Jira Mobile Connect).

you donwload here and import project in you workspace.

Then in your android proyect
properties -> android
add JMC library.

I had to edit AndroidManifest.xml file and add the following between the tags:

<service android:name="com.atlassian.jconnect.droid.service.RemoteFeedbackService" />

I had to add some configuration strings for Jira Mobile Connect to be able to know which project and server url to post crash reports and/or feedback to. The server url is the url of the server to where your Jira instance is hosted. The api key is obtained from your install of Jira and the project name is the name of the project. The file that I add this to is /res/values/strings.xml:

<!-- JIRA connect settings -->

<string name="jconnect.droid.config.server_url">http://your-url.com:8080/</string>
<string name="jconnect.droid.config.project">FA</string>
<string name="jconnect.droid.config.api_key">KEY_XXXXXXXXXXX</string>

<string name="crash_notification.title">JMC Sample App Crashed</string>
    <string name="crash_notification.text">Click to send a crash report.</string>
    <string name="crash_notification.dialog_text">The sample app has crashed. Please click okay to send back the data to the developers. (You are awesome btw; just putting it out there.)</string>
    <string name="crash_notification.dialog_request_user_email">Your email address:</string>

You should replace ‘KEY_XXXXXXXXXXX’ with your key and you should replace ‘http://http://your-url.com:8080/’ with your url. You can find your key within Jira at Administration/Projects//Summary/Settings.

Now you create a class that extends application

package com.thedeveloperworldisyours.integratejiraandroid;

import org.acra.ReportingInteractionMode;
import org.acra.annotation.ReportsCrashes;
import android.app.Application;
import com.atlassian.jconnect.droid.Api;
@ReportsCrashes(
        formKey = "",
        mode = ReportingInteractionMode.NOTIFICATION,
        resDialogEmailPrompt = R.string.crash_notification_dialog_request_user_email,
        resNotifTickerText = R.string.crash_notification_title,
        resNotifTitle = R.string.crash_notification_title,
        resNotifText = R.string.crash_notification_text,
        resDialogText = R.string.crash_notification_dialog_text)
public class MyApplication extends Application{
	 public void onCreate() {
		 Api.init( this );
	        super.onCreate();
	    }
}

Also you had to edit AndroidManifest.xml and add the Internet permission and the name of application.

<uses-permission android:name="android.permission.INTERNET"/>
<application


 android:name="MyApplication" >

If all that you want is crash logging, you can stop here because the call to App.init causes the crash reporting to work.

Next, if you want to send feedback you will create a activity.
Your activity has a button which send feedback.

In your activity.xml

<RelativeLayout xmlns:android="http://schemas.android.com/apk/res/android"
    xmlns:tools="http://schemas.android.com/tools"
    android:layout_width="match_parent"
    android:layout_height="match_parent"
    android:paddingBottom="@dimen/activity_vertical_margin"
    android:paddingLeft="@dimen/activity_horizontal_margin"
    android:paddingRight="@dimen/activity_horizontal_margin"
    android:paddingTop="@dimen/activity_vertical_margin"
    tools:context=".TheDeveloperWorldIsYoursActivity" >

    <TextView
        android:id="@+id/textViewTitle"
        android:layout_width="wrap_content"
        android:layout_height="wrap_content"
        android:text="@string/hello_world" />
    <Button android:id="@+id/buttonFeedback"
        android:layout_below="@+id/textViewTitle" 
        android:layout_width="wrap_content"
        android:layout_height="wrap_content"
        android:text="@string/feedback"/>

</RelativeLayout>

Now you Activity.class this code

package com.thedeveloperworldisyours.integratejiraandroid;

import com.atlassian.jconnect.droid.Api;
import android.app.Activity;
import android.os.Bundle;
import android.view.View;
import android.view.View.OnClickListener;
import android.widget.Button;

public class TheDeveloperWorldIsYoursActivity extends Activity {

	private Button feedbackButton;
	
	@Override
	protected void onCreate(Bundle savedInstanceState) {
		super.onCreate(savedInstanceState);
		setContentView(R.layout.activity_the_developer_world_is_yours);
		feedbackButton = (Button) findViewById(R.id.buttonFeedback);
		feedbackButton.setOnClickListener(new OnClickListener() {
			
			@Override
			public void onClick(View v) {
				startActivity(Api.createFeedbackIntent(TheDeveloperWorldIsYoursActivity.this));
			}
		});
		
	}
}