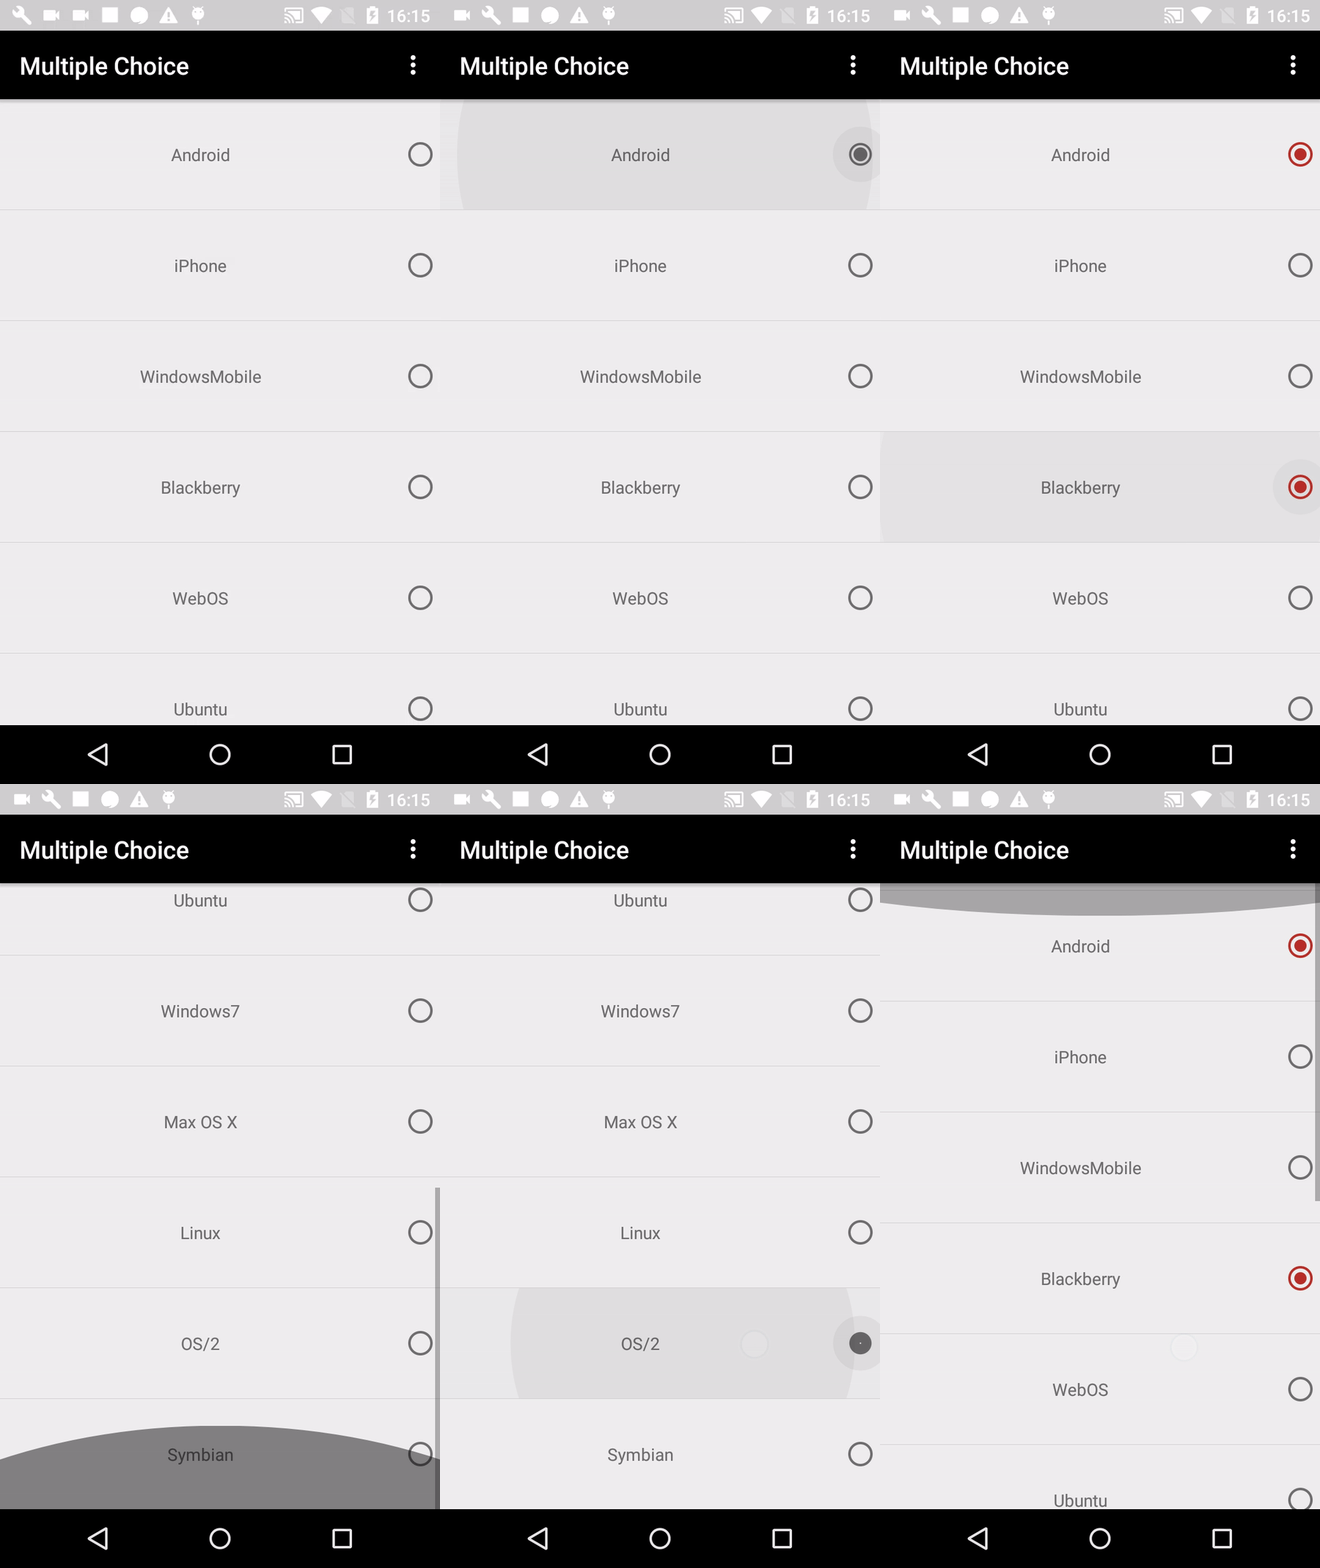
notifyDataSetChanged() example:

This android function notifies the attached observers that the underlying data has been changed and any View reflecting the data set should refresh itself.
You can use notifyDataSetChanged ArrayAdapter, but it only works if you use the add(), insert(), remove(), and clear() on the Adapter.
When an ArrayAdapter or BaseAdapter are constructed, it holds the reference for the List that was passed in. If you were to pass in a List that was a member of an Activity, and change that Activity member later, the ArrayAdapter is still holding a reference to the original List. The Adapter does not know you changed the List in the Activity.
How to implement notifyDataSetChanged
Your choices are:
Use the functions of the ArrayAdapter to modify the underlying List (add(), insert(), remove(), clear(), etc.)
Re-create the ArrayAdapter with the new List data. (Uses a lot of resources and garbage collection.)
Create your own class derived from BaseAdapter and ListAdapter that allows changing of the underlying List data structure.
Use the notifyDataSetChanged() every time the list is updated. To call it on the UI-Thread, use the runOnUiThread() of Activity. Then, notifyDataSetChanged() will work.
Multiple choice in listView
You need:
Interface
Data (String text, boolean selected)
Adapter
Fragment or Activity (calling notifyDataSetChanged custom adapter)
list_item.xml
You can start with data:
public class MultipleData {
    private String text;
    private boolean selected;

    public MultipleData(String text, boolean selected) {
        this.text = text;
        this.selected = selected;
    }

    public String getText() {
        return text;
    }

    public void setText(String text) {
        this.text = text;
    }

    public boolean isSelected() {
        return selected;
    }

    public void setSelected(boolean selected) {
        this.selected = selected;
    }
}
list_item.xml
<RelativeLayout xmlns:android="http://schemas.android.com/apk/res/android"
    android:layout_width="match_parent"
    android:layout_height="match_parent">

    <TextView
        android:id="@+id/list_item_text"
        android:layout_width="match_parent"
        android:layout_height="90dp"
        android:text="@string/app_name"
        android:layout_toLeftOf="@+id/list_item_check_button"
        android:gravity="center"/>

    <RadioButton
        android:id="@+id/list_item_check_button"
        android:layout_width="wrap_content"
        android:layout_height="90dp"
        android:layout_alignParentRight="true"
        android:checked="false"
        android:clickable="false"
        android:focusable="false" />

</RelativeLayout>
activity_mail.xml
<RelativeLayout xmlns:android="http://schemas.android.com/apk/res/android"
        xmlns:tools="http://schemas.android.com/tools"
        android:layout_width="match_parent"
        android:layout_height="match_parent"
        tools:context=".MainActivity">

        <ListView
            android:id="@+id/fragment_multiple_list_view"
            android:layout_width="wrap_content"
            android:layout_height="wrap_content" />

</RelativeLayout>
Adapter
public class MultipleAdapter extends BaseAdapter implements SelectedIndex {
private final Context mContext;
List&lt;MultipleData&gt; mList;
@Override
public void setSelectedIndex(int position) {
if (mList.get(position).isSelected()) {
mList.get(position).setSelected(false);
} else {
mList.get(position).setSelected(true);
}
}
static class ViewHolder {
TextView mTextView;
RadioButton mRadioButton;
}
public MultipleAdapter(Context context, List&lt;MultipleData&gt; list) {
this.mContext = context;
this.mList = list;
}
@Override
public int getCount() {
return mList.size();
}
@Override
public Object getItem(int position) {
return null;
}
@Override
public long getItemId(int position) {
return 0;
}
@Override
public View getView(int position, View convertView, ViewGroup parent) {
View rowView = convertView;
if (rowView == null) {
LayoutInflater inflater = (LayoutInflater) mContext.getSystemService(Context.LAYOUT_INFLATER_SERVICE);
rowView = inflater.inflate(R.layout.list_item, null);
ViewHolder viewHolder = new ViewHolder();
viewHolder.mTextView = (TextView) rowView.findViewById(R.id.list_item_text);
viewHolder.mRadioButton = (RadioButton) rowView.findViewById(R.id.list_item_check_button);
rowView.setTag(viewHolder);
}
// fill data
ViewHolder holder = (ViewHolder) rowView.getTag();
holder.mTextView.setText(mList.get(position).getText());
holder.mRadioButton.setChecked(mList.get(position).isSelected());
return rowView;
}
}
Interface
public interface SelectedIndex {
    void setSelectedIndex(int position);
}
In your fragment or activity:
public class MultipleFragment extends Fragment implements AdapterView.OnItemClickListener {
MultipleAdapter mAdapter;
public MultipleFragment() {
// Required empty public constructor
}
public static MultipleFragment newInstance() {
return new MultipleFragment();
}
@Override
public void onCreate(Bundle savedInstanceState) {
super.onCreate(savedInstanceState);
}
@Override
public View onCreateView(LayoutInflater inflater, ViewGroup container,
Bundle savedInstanceState) {
// Inflate the layout for this fragment
View view = inflater.inflate(R.layout.fragment_multiple, container, false);
ListView listView = (ListView) view.findViewById(R.id.fragment_multiple_list_view);
MultipleData android = new MultipleData("Android", false);
MultipleData iPhone = new MultipleData("iPhone", false);
MultipleData windowsMobile = new MultipleData("WindowsMobile", false);
MultipleData blackberry = new MultipleData("Blackberry", false);
MultipleData webOS = new MultipleData("WebOS", false);
MultipleData ubuntu = new MultipleData("Ubuntu", false);
MultipleData windows7 = new MultipleData("Windows7", false);
MultipleData max = new MultipleData("Max OS X", false);
MultipleData linux = new MultipleData("Linux", false);
MultipleData os = new MultipleData("OS/2", false);
MultipleData symbian = new MultipleData("Symbian", false);
List&lt;MultipleData&gt; list = new ArrayList&lt;&gt;();
list.add(0, android);
list.add(1, iPhone);
list.add(2, windowsMobile);
list.add(3, blackberry);
list.add(4, webOS);
list.add(5, ubuntu);
list.add(6, windows7);
list.add(7, max);
list.add(8, linux);
list.add(9, os);
list.add(10, symbian);
mAdapter = new MultipleAdapter(getActivity(),list);
listView.setAdapter(mAdapter);
listView.setOnItemClickListener(this);
return view;
}
@Override
public void onItemClick(AdapterView&lt;?&gt; adapterView, View view, int position, long l) {
mAdapter.setSelectedIndex(position);
mAdapter.notifyDataSetChanged();
}
}
You can download the source code of this example in github.
If you have any questions about the usage of notifyDataSetChanged leave a comment below and we’ll try to help you.
Happy coding!

Pingback: Multiple choice recycler view • The Developer World Is Yours
Nice!!!
thank you so much..